nce clicked, you’ll be automatically transferred to Mojomarketplace.com – don’t panic, this is just a site that helps HostGator install platforms (like WordPress).
You should immediately see a screen where you’re offered to “Install” or “Import” WordPress.
Click “Install” to get to the next step.
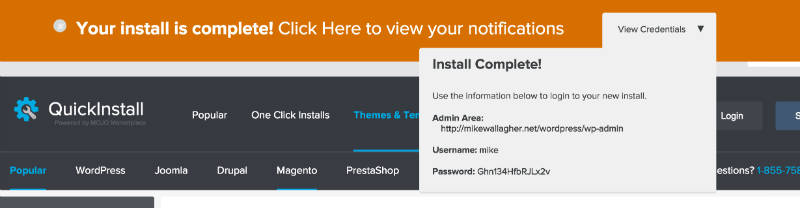
When you’re finished, “Install WordPress”. Once you’ve done that, you’ll see a loading bar at the top of your page that will eventually tell you that your WordPress blog has been installed and you’ll see your log-in credentials.
6. Log in in and check out your new blog
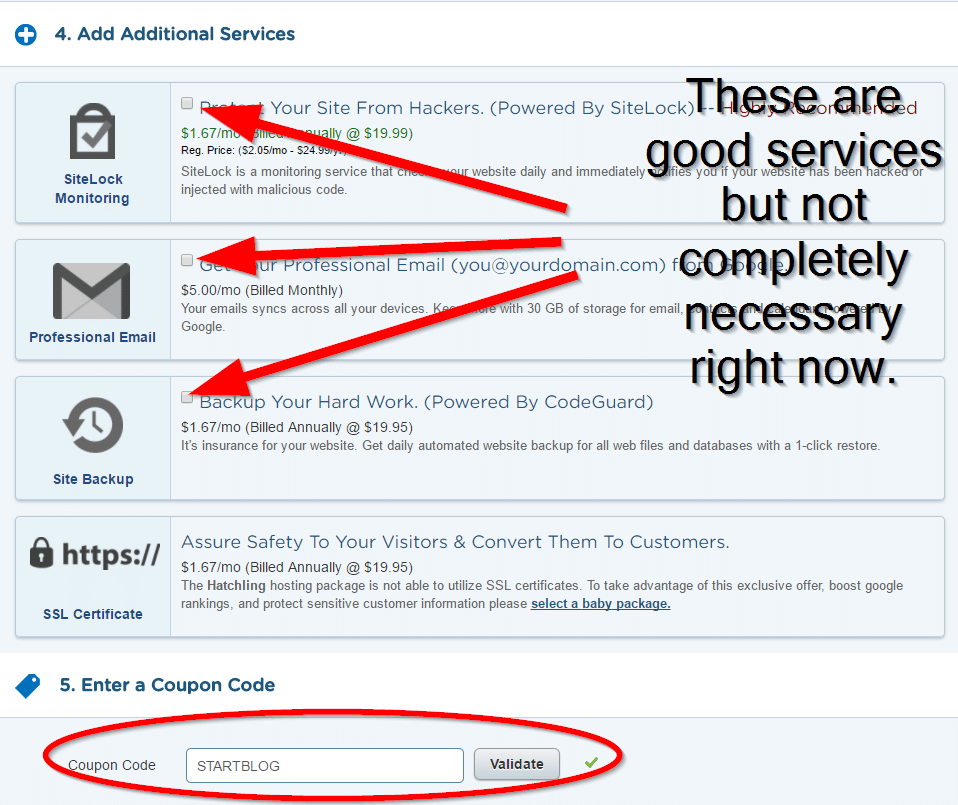
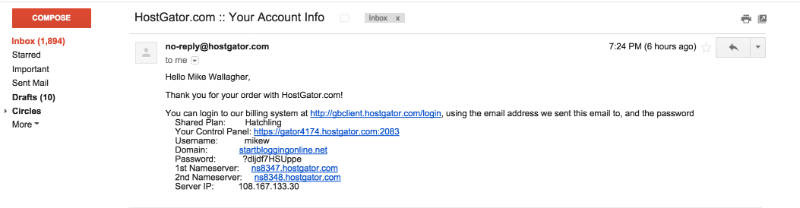
Once the installation completes, you’ll get an email that shares your login information, including an “Admin URL”. (In case you missed that notification bar)
To log in to your blog, click the admin URL. If you forget this URL, it’s simply www.yourblog.com/wp-admin (where “yourblog” is your domain name).
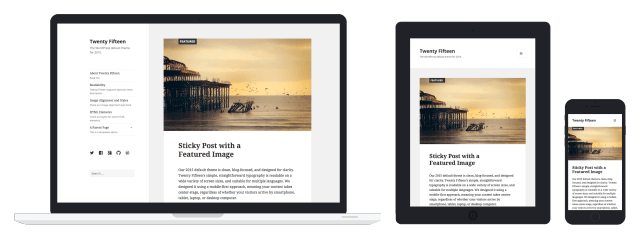
Congratulations – you now know how to make a blog using WordPress. You’ve installed WordPress and set up your blog, all on your own! As you can see, it was really easy and straightforward.
In this section, I’ll show you some WordPress blog basics, including:
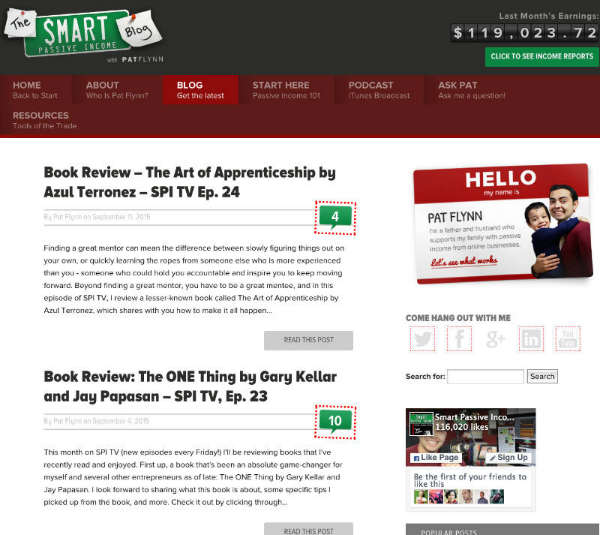
Sample of a customized WordPress blog (SmartPassiveIncome.com)
- Getting familiar with WordPress dashboard
- Changing your blog’s design
- Installing new plugins/features
- Making your blog search engine friendly
If you’ve set up your blog, you’re now ready to start using WordPress and customizing your blog. I promise – it’ll be pretty easy and fun at the same time.
Remember: You can log in to your blog by going to www.yourblog.com/wp-admin/ and using the credentials you set up with HostGator or any other hosting company you used.
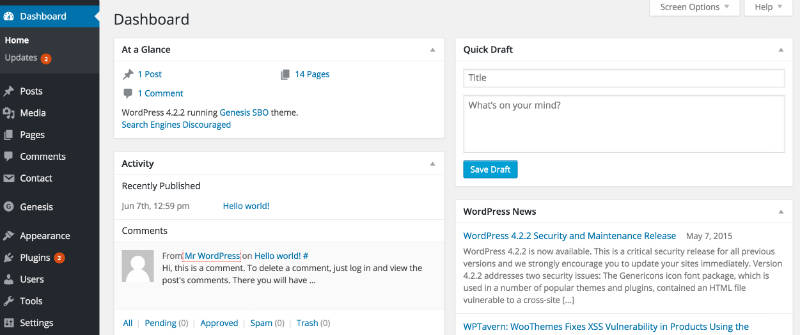
Understanding the WordPress Dashboard
When you log in for the first time, you’ll see a dashboard or admin panel that looks something like this:
Let’s break down some of the most important ones for new bloggers to know:
- “Dashboard” shows you an at-a-glance look at your recent activity, including how many posts, comments and pages you have. You can also write up a quick draft blog post here – but don’t – I’ll show you a better way a little later in the guide.
- “Posts” is where you’ll click if you want to add a new blog post or edit an existing one.
- “Media” is the library of all the pictures, videos, and audio files you’ve uploaded to the site. You can manage all of those items here.
- “Pages” is where you can add a new permanent page – like a services or contact me page (not a blog post!) and manage the pages you’ve already created.
- “Comments” is the place you’ll want to go to manage comments. You can see which comments are waiting for your approval, review comments you’ve approved, see which comments WordPress has labelled as spam and delete comments you don’t want.
- “Appearance” – this is where you can edit your blog’s design and install new themes and layouts. I show you exactly how to do this a little later in the page.
- “Plugins” is where you’d click if you wanted to install a new plugin, like a photo gallery or SEO tool. I’ll show you how to do this in a moment.
- “Settings” is the last section you need to know about. Here, you can change your site’s title and tagline, edit your email address and manage all of your site’s important settings.
Changing Your Blog’s Design (Themes & Layouts)
WordPress blogging platform uses design templates called “Themes” to figure out how your site should look. Changing your blog’s layout and design is as simple as installing a new theme.
There are over 2,000 professionally designed, fully-customizable and free themes to choose from – so you’ve got a lot of options. If you want to see more premium type of templates and themes, head over to
Themeforest.net
Here’s how to find and install a theme you love:
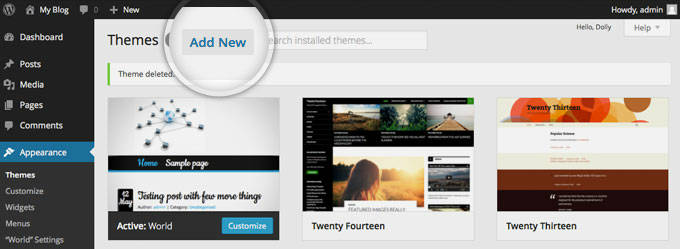
Mouse-over the “Appearance” tab in the WordPress sidebar, then click on “Themes”.
On the next screen, you’ll see several themes are already installed. If you don’t like those, click the “Add New” button at the top, or the great big “Add New” square to start searching for a theme.
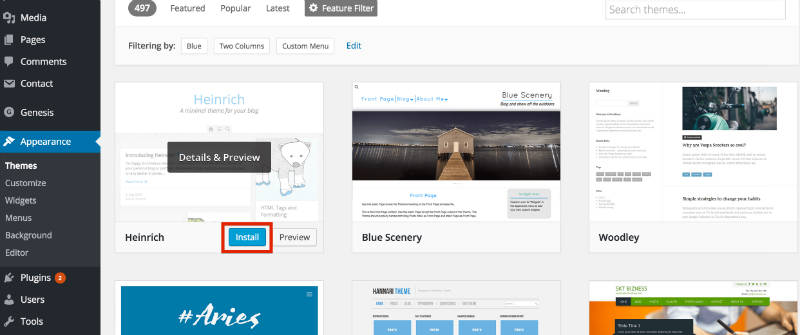
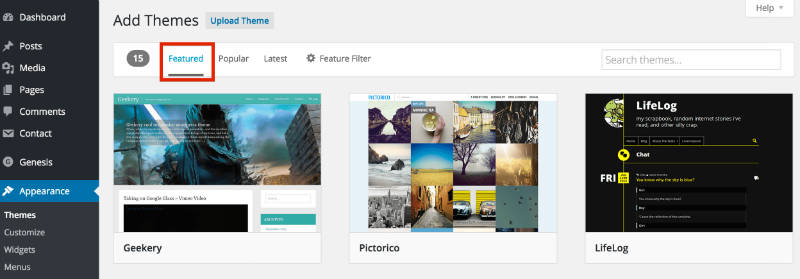
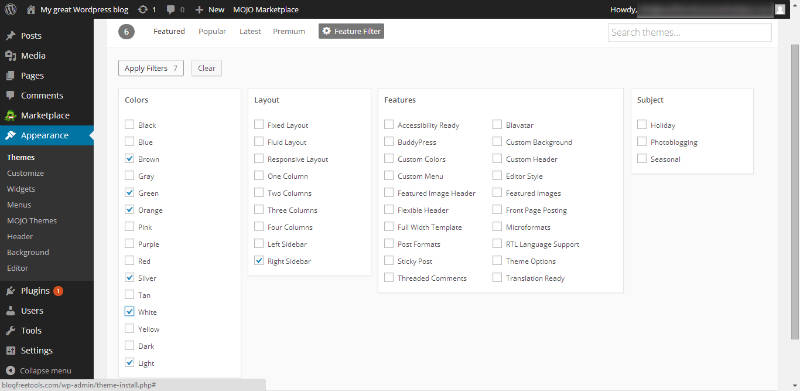
Now, you’ll see tabs where you’ll find featured, popular and brand new themes, as well as a “Feature Filter” and search bar.
I really like the “Feature Filter” option, because you can choose themes in certain color schemes, select specific layouts and even choose themes with built-in advanced features.
Just choose the options you want, then click “Apply Filters” on the left hand side. If you’re finding this challenging, just search by keyword – there’s no wrong way!
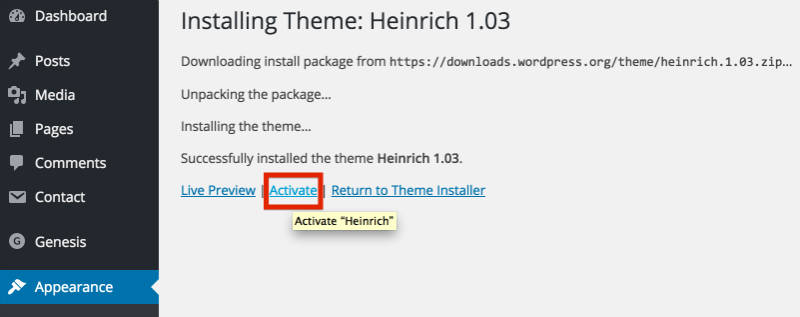
When you’ve found a theme you like, click “Install”. You’re nearly done!
Once the theme has been installed, all that’s left to do is click “Activate” on the next screen:
Installing a New Plugin (add some cool features to your blog)
“
Plugins” are little software modules that you can install to add features and tools to your blog. They can do all sorts of things, like:
- Adding contact forms
- Reducing comment spam
- Making your blog SEO-friendly
- Creating newsletter sign-up forms
- Adding photo galleries
And lots, LOTS more.
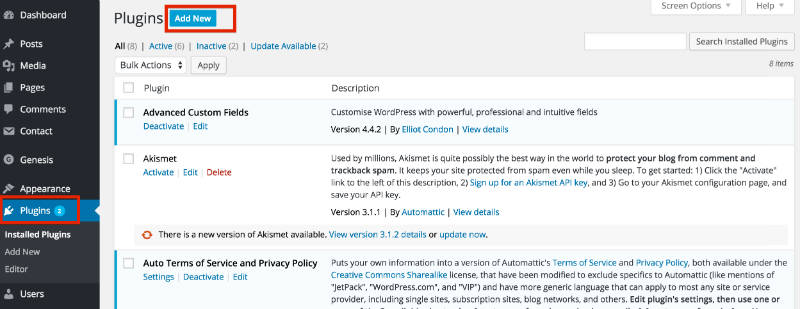
Installing them is really easy. First, Mouse-over “Plugins” in the sidebar, then click “Add New”.
Now, you can search by keyword to find plugins for almost anything!
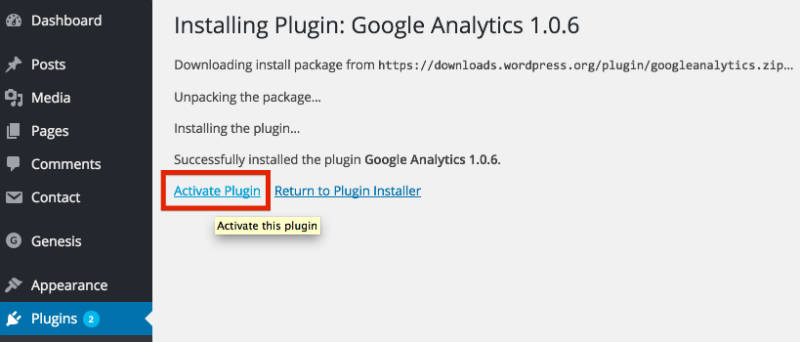
When you find a plugin you like, just click “Install Now” and then “Activate Plugin” on the page that follows.
BE CAREFUL: Before you install any plugin, it’s a smart idea to Google its name and read reviews. Some plugins can break your theme, cause problems with security, or just plain work poorly, so always get a second opinion first.
Also, make sure your plugins (and themes) are always up-to-date. Don’t worry though, WordPress usually lets you know when some of them are out of date.
Configuring your blog to be search engine friendly
There are some things you’d need to do to make your blog more search engine friendly. Search engines do not like two things:
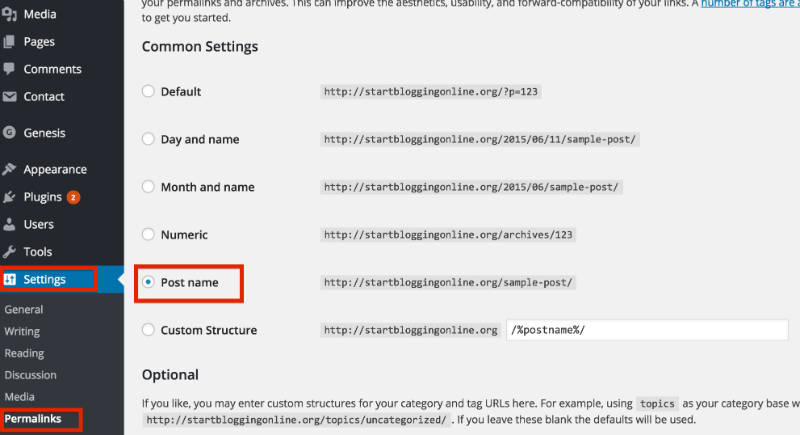
- Ugly and clumsy URL-s – http://yourblog.com/2012/04/topic-a/author-Karen/how-to-start-a-blog. A much better way is to use: http://yourblog.com/start-a-blog
See the difference? One is filled with irrelevant information and the another one is short, clean and neat.
In order to change your links to a more cleaner, click on the “Settings” -> “Permalinks” and use the following settings:
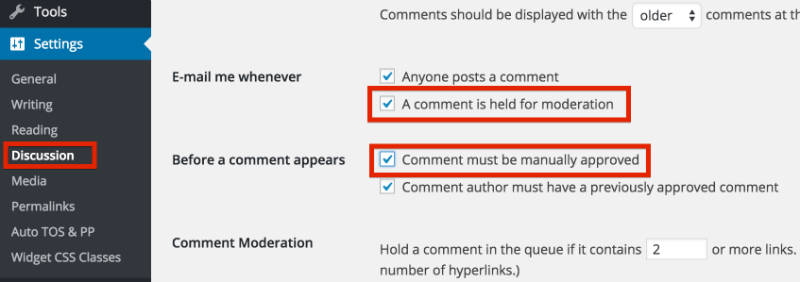
2. Spam comments – Unfortunately, lots of people want to leave automate spam comments on your blog. They do that for couple of reasons – to get people from your blog to their blog and to advertise their services/products.
To avoid that, make sure you moderate your comments. Here’s how to do that: Go to “Settings” -> “Discussion” and tick those two options.
Managing Your User Information
If you ever need to change your user details, password, or add another user so someone else can access your blog, it helps to know how to manage your user details.
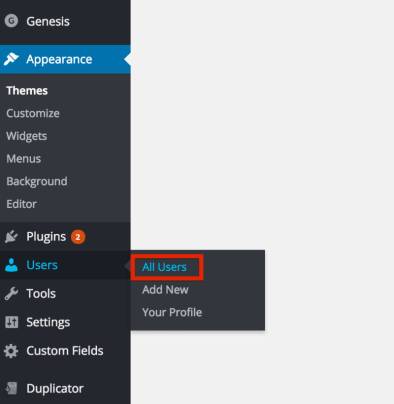
To manage users, mouse-over the “Users” tan on the left-hand menu.
Adding a New User
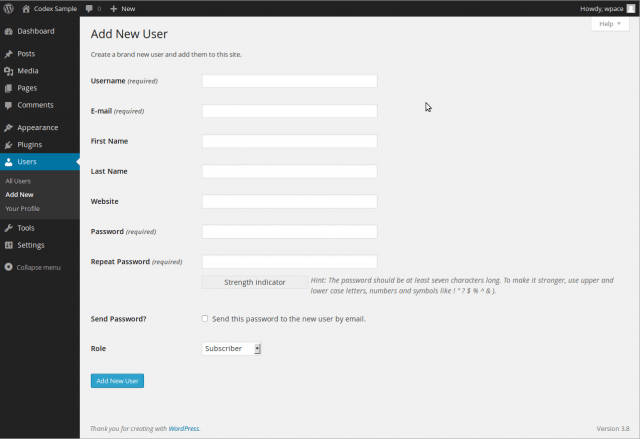
Click the “Add New” link in the users section of the left-hand menu, and you’ll be brought to this page:
Fill in the details for the user you’d like to add – including a password you can remember to share with them. You can send it to them via email by clicking the radio box option – but that’s not always the most secure way to do things.
BE CAREFUL: The “Role” you choose from the dropdown menu will determine what your new user is able to do.
- “Subscribers” are only able to manage their own profiles – not update or change content.
- “Administrators” can access all the administration options – making any changes or adding new users.
- “Authors” can publish and manage their own posts, but nothing else.
- “Contributors” can write and manage their own posts, but cannot publish them.
- “Editors” can publish and manage posts – including the posts of other users.
Don’t give access to anyone who doesn’t need it!
Step 4: Adding/Writing Blog Posts and Pages
By now you should have fully working WordPress blog on your own domain name. You should also have a custom blog theme that fits with your blog’s topic. Congratulations – you’ve done a LOT and I’m proud that you’ve managed to get so far.
In the LAST step, I’ll show you how to write your first blog post and share some tips for writing blog posts.
In this section, I’ll show you…
- How to write a post inside WordPress
- How to add images, links and format text
- Some quick tips and tricks for writing great content
Using WordPress to Blog
Adding a New Post
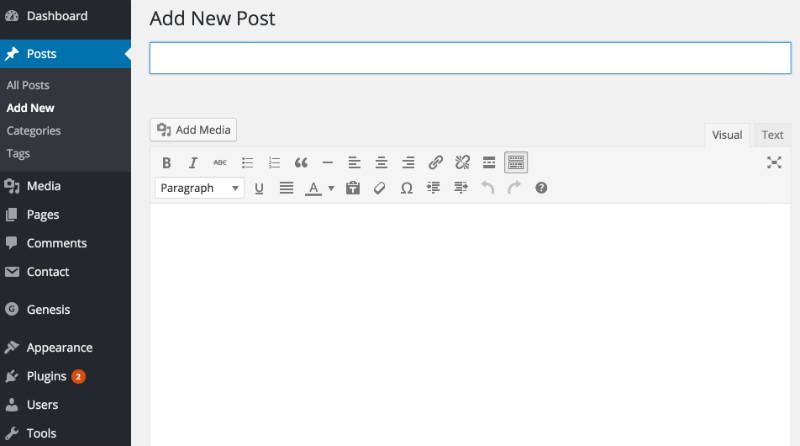
To add a new blog post, click the “Posts” section on the left hand side-menu, then click on “Add New”.
On the next screen, you’ll see something like this:
You can add the title to your blog post in the top field, and your content goes in the big text box below the title.
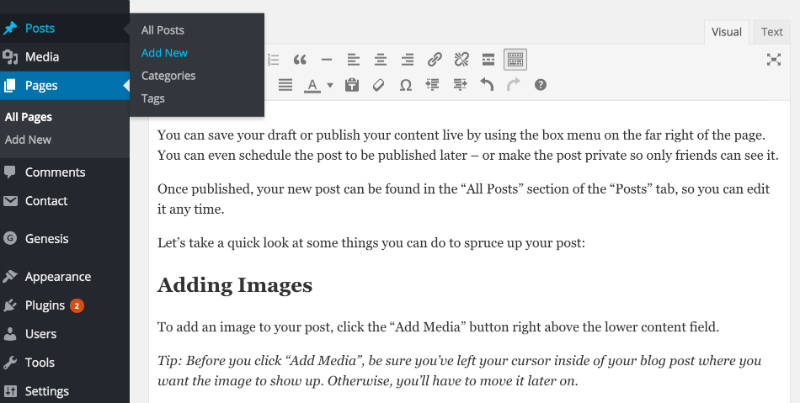
You can save your draft or publish your content live by using the box menu on the far right of the page. You can even schedule the post to be published later – or make the post private so only friends can see it.
Once published, your new post can be found in the “All Posts” section of the “Posts” tab, so you can edit it any time.
Let’s take a quick look at some things you can do to spruce up your post:
Adding Images
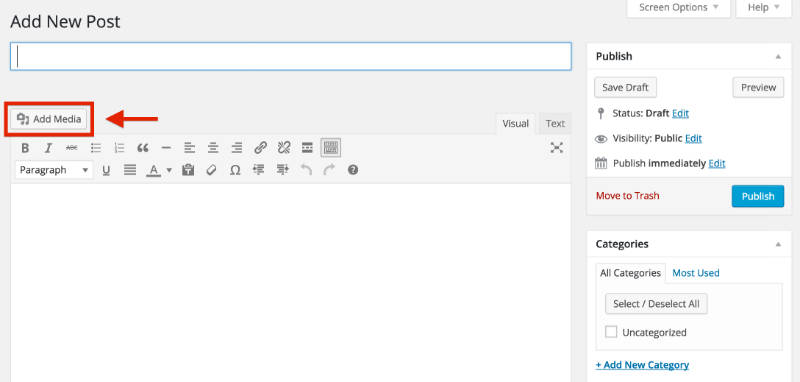
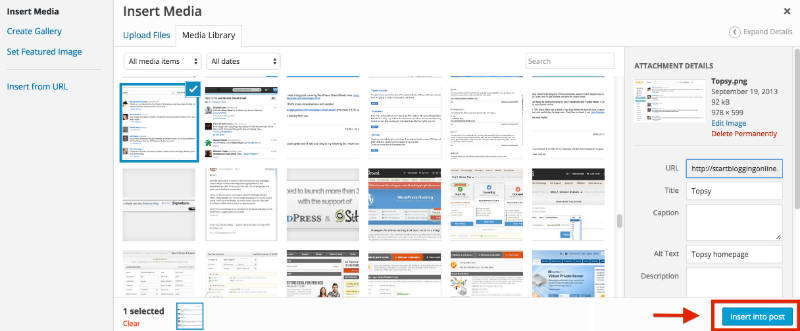
To add an image to your post, click the “Add Media” button right above the lower content field.
Tip: Before you click “Add Media”, be sure you’ve left your cursor inside of your blog post where you want the image to show up. Otherwise, you’ll have to move it later on.
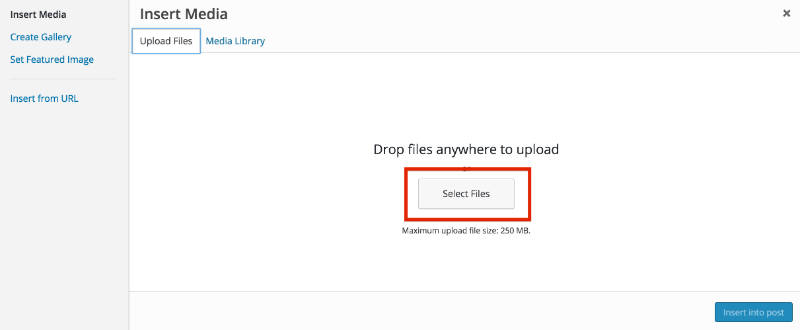
Next, click the “Upload Files” tab on the screen that pops up, then click “Select Files”.
Once you’ve found the file, double click it and WordPress will upload it automatically.
When the upload is finished, make sure the image you want is selected, then click the “Insert into post” button to add the image to the post you’re writing.
Adding a Link
Linking out to other websites is a great way to build relationships and share interesting content.
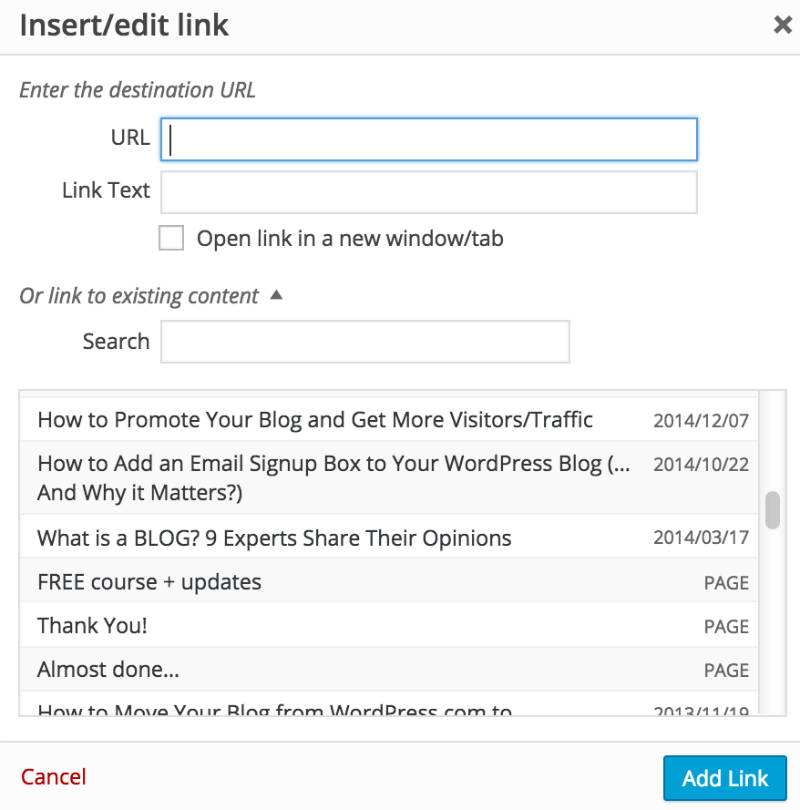
To add a link, click on the icon in the toolbar that looks a bit like a chain link.
On the pop-up, you’ll need to enter a few important bits of information.
- URL is the web address of the link you want to share. Make sure you include “http://” before the “www.” address, or your link will be broken.
- “Link Text” is the text you want people to click on to get to your link. It might be “Click here”, or anything you choose.
- “Open link in a new window/tab” – it’s a smart idea to check this box. Otherwise, when someone clicks your link, they’ll leave your blog.
- If you want to link to an existing page, you can use the “Search” section to find a post or page you’ve already created and click it to add a link.
Finally, click “Add Link”, and your link will be added where you left your cursor in the post you were writing.
Adding Headers & Editing Text
It’s a good idea to use headers and bolding to make your content easier to read and scan.
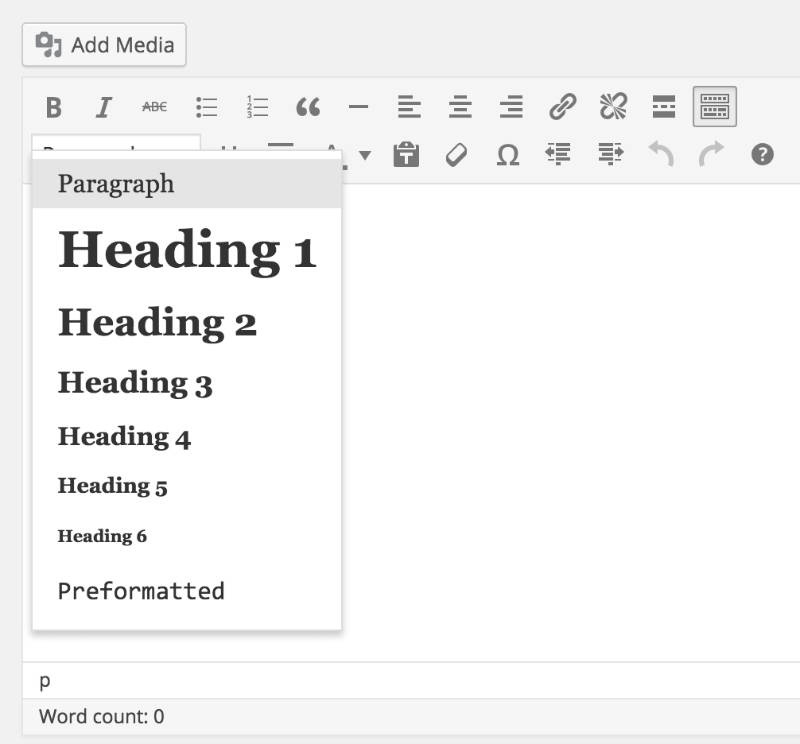
Adding Headings
To add a heading, click on the drop-down menu on the bottom left of the toolbar.
Try to only use “Heading 1” once within your page (usually at the top), and use “Heading 2” or “Heading 3” for other sections in the copy, as this is better for search engines.
Tip: You can also highlight the text you want to change in your blog post, THEN click on the dropdown menu and select the format you want the text to be in.
Editing Fonts
You can also bold, italicize, underline and even change the colour of your text in a click or two.
- “B” is for bolding
- “I” is for italics
- “U” is to underline your text
- “A” will open a dropdown menu where you can select font color
As you can see, this is all pretty simple for someone who has worked with Microsoft Word.
Step 5: MAKE YOUR BLOG SUCCESSFUL

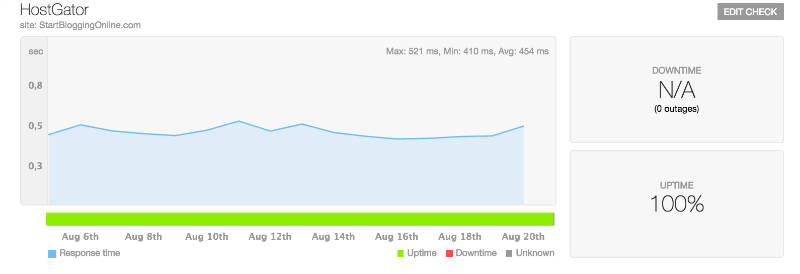
Analytics from StartBloggingOnline.com (taken from my personal laptop).
Now that you have set up your blog and know the basics, it’s time to make your blog successful. Many
beginners struggle at that point, thus I’ve put together a handful of guides to get you going easier.
If I were you, I’d suggest you to go and check my
resource page here. It contains all the content that I’ve published on StartBloggingOnline.com over the past couple of years. It’s nothing too much, but enough to get you going and a bit more.
Things to do after you’ve created your blog:
The first thing I’d do is create a proper About Me and Contact page.
Done those two? Go and read those posts.
Ready to take your blog into next level?
Once you have some content on your blog it’s time to get some traffic and make it profitable.
FAQ (Frequently Asked Questions)
Q: What blog site should I use?
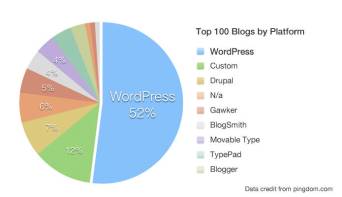
A: WordPress is the most popular platform, powering over 25% of the web! Best of all: it’s free.
Q: How do bloggers make money?
A: There are a number of ways including advertising and digital products, but some people just do it for fun. Check out my article
How To Make Money From Your Blog.
Q: Are blogs social media?
A: Blogs can be considered social media, because they have comments and social interactions. However from a technical standpoint, analytics software does not count blog traffic as social media traffic.
Q: What’s the difference between a blog and a website?
A: Blogs are frequently updated with articles while a website is generally “set it and forget it”. Blogs might have less features than a website and just focus on creating really good content. For this reason a blog is more socially active, with shares and comments.